The B.B. in the title represents that this is from the archive of the late Bill Bently, who ran a flathead Q&A informational site before he passed away. All threads from this source will be titled using the B.B. identifier on this site. We’re archiving some of the threads, so that his work is not lost or forgotten and so they will continue to educate flathead enthusiasts for years to come.
Suggestion: Next time you need battery cables, go to the flea market and buy some junk 6V battery cables for under a buck a piece. Then stop by your parts store and buy the electrical terminals you need. Cut the cables to the exact length you want, strip the insulation, tin them, and solder the electrical terminals with some rosin core solder. Lot cheaper and they’re the exact length for your rod. Neat!

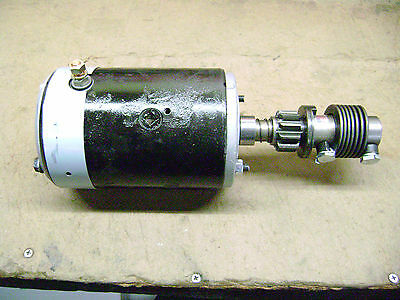
About a starter turning over good on 6V and not dragging, I suspect the starter is not the problem. Something to consider is the newness of your mill. If it’s still a little tight, it takes a lot of voltage to crank it over when hot and clearances are minimal. After a 1000 miles or so, it’ll be loosened up and may start up when hot. If the trouble persists, try this to determine where the problem is…. get the engine hot and shut it off. While your waiting for it to heat soak and get hard to start, connect one post from a spare 12V battery directly to the starter post (you don’t need to remove the 6V cable). After you’re sure it’s been long enough and the engine is hard to start, connect the other post of the 12V battery to a ground on the car. This will engage the starter using 12V. Then, the 6V is dedicated to only the ignition system.
DO NOT PUSH ON THE 6V STARTER BUTTON WHILE THE 12V IS ENGAGED!
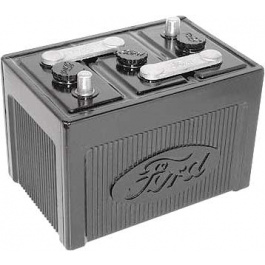
If the engine fires right up, you know the starter is pulling too much load from the 6V system and there isn’t enough left to fire the ignition properly. These flatheads sometimes get balky when shut down and especially if they’re built up with more cubes and compression. Mine does. So I run both a 6V and 12V battery. Everything runs on 6V including the starter. The 12V is also connected to the starter and has it’s own starter button up under the dash. If it won’t start right up with the 6V, I stop using the 6V button and hit the 12V and it fires right off. The 12V battery doesn’t charge from the car’s 6V generating system, but is a total loss system. I trickle charge it overnight only twice a year since it doesn’t take much to start these engines.
Write me if you want to know how to hook up both batteries…. rumble seat

RE: to rumble seat
Engine
jim: Leave everything the same as it now is (6 volt). Everything will work the same as it does now. What we’re going to do is to add a second battery that will be 12 volt and will be used for the starter only. This battery will be a ‘total loss’ battery in that it will not receive any charge from the car and must be charged from an external source. Connect the positive post of the 12V battery to ground (the car’s frame is good) using a battery cable. Pick up a 12V solenoid (like what’s on a Ford Falcon) and a starter button that does not go to ground. We want to feed through the starter button to the solenoid… not have a grounded starter button system. The 12V solenoid bolt flange has to be grounded so bolt the solenoid to the car’s frame. Next run a 12V battery cable from the negative post of the 12V battery to the solenoid. Install the new 12V starter button in the dash. I locate it in under the lip of the dash somewhere near the dash’s middle to keep from getting it confused with the 6V button. You sure don’t want to run both at the same time!!! Now run two 16 gauge wires from the 12V solenoid to the new 12V starter button. One will go from the same terminal as the incoming 12V cable from the battery (this is the 12V source) to one terminal on the 12V starter button. The other 16 gauge wire will go from the small threaded
terminal of the solenoid (left side as you look at it) to the other terminal on the 12V starter button. All that’s left is to run a 12V battery cable from the other large terminal on the 12V solenoid to the starter. This will go directly on top of the existing 6 volt cable at the starter itself. Now you can start it with 6V or 12V. I use 6V all the time unless it hesitates. Then I hit the 12V. What’s neat is that the entire 6V is going to the distributor and none is going to crank the engine. Consequently the ignition spark is hotter and will start easier. If you’re 6V goes dead, but you’re running a 6V generator, you can start the engine using 12V since the generator will charge enough at cranking speed to fire the distributor. I’ve found that I only have to charge my 12V once a year on an overnight trickle charge. If you’re a purist you can hide the 12V battery behind your spare or remove it for judging. If I didn’t explain this enough, please tell me and I’ll do better.
rumble seat: 1/16/2001 – 1/1/1900 3:20:12 PM
RE: re rumble seat
Electrical

No sweat. Run everything 6V as is… even to the starter. Add a second 12V
battery wherever you have space. Connect the positive post to ground on the frame. Run the negative battery cable (12V cable is sufficient) to a second solenoid you’ve installed near the starter. It has to be 12V (Falcon etc. work) and its mount must be grounded. The small wire terminals are marked S and T. The large stud located on the same end as the S is for the incoming cable from the battery. The large stud located on the same end as the T is for the outgoing cable to the starter. Now run a #14 wire from this battery fed solenoid post to another starter button in your car (mines in the middle of the dash and is on the underside lip to prevent confusing it with the 6V). This starter button has to have two terminals since it doesn’t make a circuit to ground like the 6v does,
but completes the circuit by going back to the solenoid. Connect the #14 from the solenoid battery cable post to one terminal on the starter button. Now run another #14 wire back to the 12V solenoid and connect it to the small terminal marked S (the T terminal is not used). Lastly, install a 12V battery cable from the large cable stud on the solenoid (at the T end) to the 6V starter and connect it directly on top of the 6V cable. You’re done. Now you can start it with 6V by using the 6V starter button… or, if it balkes, start it on 12V by using the 12V starter button. DON’T USE THEM BOTH AT ONCE. IT COULD FEED 12V
BACK THROUGH YOUR 6V SYSTEM AND SMOKE THINGS GOOD. The
6V system functions and charges as usual. However, the 12v is a total loss
system. That means it doesn’t receive any charge from the cars charging system. It has to be charged using an external 12V battery charger. Ive been running this setup for over 5 years and charge the 12V only once a year using a trickle charger overnight. Doesn't take a lot of juice to start a Flathead on 12V since it turns over a lot faster. A side benefit, since you’re not using 6V to crank the engine, the 6V has no voltage drop to the distributor when using the 12V.... the entire 6V is dedicated solely to the distributor which makes the engine start a lot faster. Also, if you‘re running a 6V generator and the 6V goes dead, you can start it using 12V since the generator will spin fast enough to generate juice to the distributor. Hope this helps…..
Was this article a help? Consider supporting the Flat-Spot by becoming a Premium Member. Members get discounts with well known retailers, a cool membership packet full of goodies and your membership goes toward helping us upkeep and expand on this great archive.


