Author: Dale “Bored and Stroked” Hays, Vintage Horsepower, daleohays@gmail.com
Installment #6 – Spring Retainers: Okay, so you’ve read the rest of my boring and lame ass posts . . . might as well give the capper this evening . . .
Installed Spring Height is Key! The numbers that I posted on the previous installment showed that you need to achieve an installed spring height of about 1.950 – 1.980 (depending on which spring you’re using and how many lbs you want/need on the seat). If you’re running the typical SBC 1.5″ pro-flow, better than a Ginzu frigging valves . . . that anybody can buy from anyplace . . . but the flathead web sites sell as if they have a “special part” just for you . . . then you’re running a valve that is about 4.910 or so in length. The stock flathead valve (if I remember correctly) is 4.810 in length – so you’re already .100 longer . . . which means MORE spring shims.
So lets take a typical combination of SBC 1.5″ or 1.6″ 4.910 valves, Lincoln Zephyr springs and a desired installation height of say 1.950 or so. Well, without ANY spring shims, running stock retainers . . . you’ll have an installed spring height of over 2.1 inches – this is WAY too weak! (I know – depends on your engine, the one I just did was about 2.150). That means you need three .060 shims and one .030 shims . . . lots of them stacked up like a bunch of nickles. If you buy the Zephyr springs and complete valve package from places like Reds . . . they throw in one .060 shim per valve — not even close . . . (you’d think they’d know the issue . . . guess not!)
Solving the Spring Height/Retainer Problem: Don’t just slap the damn valves, springs, retainers together . . . cause you bought the kit and that is all your have to use

. . . get off your butt and buy some aftermarket chrome moly retainers
(Comp Cams: 743-16) – and turn them down on a lathe to end up with the
following:
a) The correct installed height – with probably NO shims
b) A nice chrome moly retainer . . . much better than the stock stuff.
c) A much cleaner valve setup with a nice tight fit between the valve
spring and the retainer. The inner valve spring area of these cut-down
retainers fits a flathead Zephyr or 185G spring perfectly!
Here are some examples of what I do – using the Comp Camps chrome moly retainers — part number “743-16”
a) Mount them in a lathe
b) Turn the OD down to match the OD of your Zephyr or 185G springs
c) The spring will have a tight fit on the inner spring location of the retainer.
d) Put a valve, guide, spring, retainer, lock assembly together.
e) Install it in your block and measure the installed height – adjust as
necessary. The thicker retainer will be equal to 2 – 3 thick shims . .
. you may still need some, just depends on the lbs you want on the
seat!
f) Tip: It is nice to have a weak ‘test spring’ – that you can just
compress by hand during the ‘fit up’ stage . . . makes life easier.
Here are some pictures:
Here are pictures of a stock, modified and Comp-Cams moly retainer – see how they’ve been turned down:
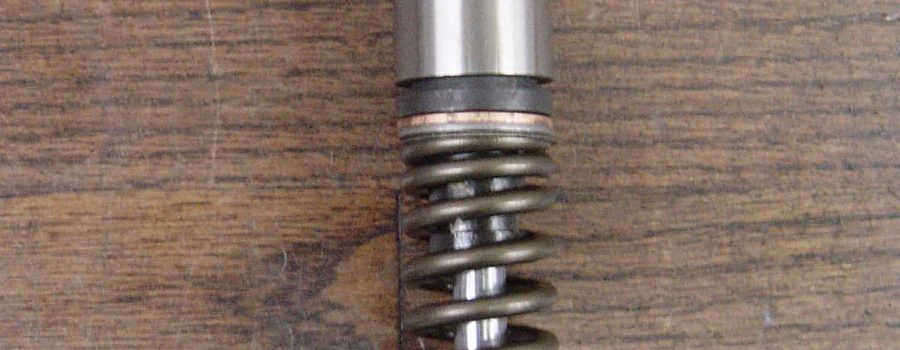
Here is the complete assembly – ready to go . . . nice and clean. I still needed one thick shim .060 and one .015 shim . . . better than 5!

Intake Manifolds and Porting
That was a very good question! You do need to pay attention to the
intake manifold that you are planning on running! Certain manifolds do
not have much material for porting – others do.
There are a couple things to note:
1) Use Blue Die-Chem around all the ports (intake side) before you start to port anything.
2) Place the manifold on the block and scribe around the manifold so you have a visual mark as to the perimeter.
3) You may find that you can’t open up the ports as much as you’d like.
4) Porting Template: If you’re new to all of this, you may want
to make a ‘porting template’ out of plastic or something thin, but
strong (even a piece of sheet steel. Finish/smooth it out and use it to
scribe the same port outlines on all the intake ports — might help you
keep things consistently shaped. It is quite hard to do that by eye
when you’re learning – once you’ve done it quite a bit, you can do
pretty well by eye.
5) Technique for Consistency – Find One and Stick to It: I’ve
found that I settle in to a consistent method of doing the major “hog
out” work. I always start in the same area of the port, using the same
methods, same tools/cutters and repeat everything on all ports. I also
spend about the same amount of time on each one.
It really helps if you do things the same — port to port . . . to get
them as close to each other as possible. Consider doing the SAME
operation to all ports in a row – then switch over to the next
operation. This also saves time on tool changes (cutters to stones,
stones to cartridge rolls, etc). The natural tendency is to do one port
at a time, but you’ll be more consistent if you do one operation at a
time (especially during the “hog out” stage!) and you’ll get done much
faster.
6) Welding up the intake: On my SCoT blower manifold for the
competition ported block, I had to have the intake manifold (aluminum)
welded up around most of the ports — to give me more material to work
with. Yes, it was a pain to do, but I wanted the big ports and it was
the only manifold I had – needed to “fix” it.
7) Intake Gaskets: You used to be able to buy big-port intake
gaskets . . . don’t know if you still can? What I would do is buy some
bulk gasket material and use an Xacto knife and make my own – that way
you’ll get an exact fit around both the manifold and ports. It is what
most of us do who port the blocks out like this.
8) Intake Porting Template – the Gasket: Since I always port the
block first, I cut the gasket to match the block – then use it as the
template to scribe the port shapes onto the manifold. Again, use
machinist’s blue die-chem on the manifold surface.
Author: Dale “Bored and Stroked” Hays, Vintage Horsepower, daleohays@gmail.com


