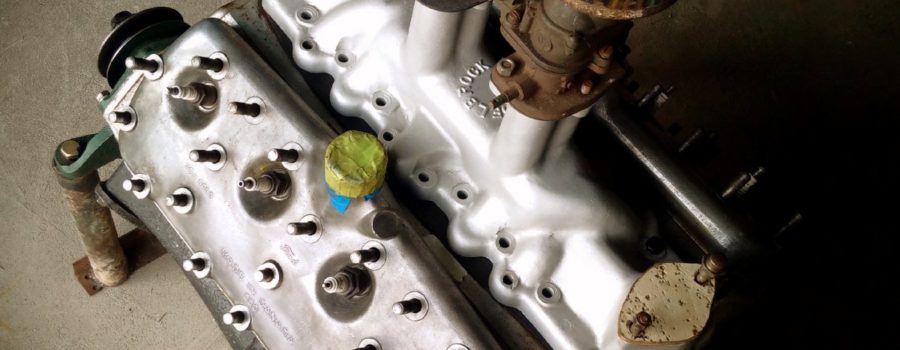
The B.B. in the title represents that this is from the archive of the late Bill Bently, who ran a flathead Q&A informational site before he passed away. All threads from this source will be titled using the B.B. identifier on this site. We’re archiving some of the threads, so that his work is not lost or forgotten and so they will continue to educate flathead enthusiasts for years to come.
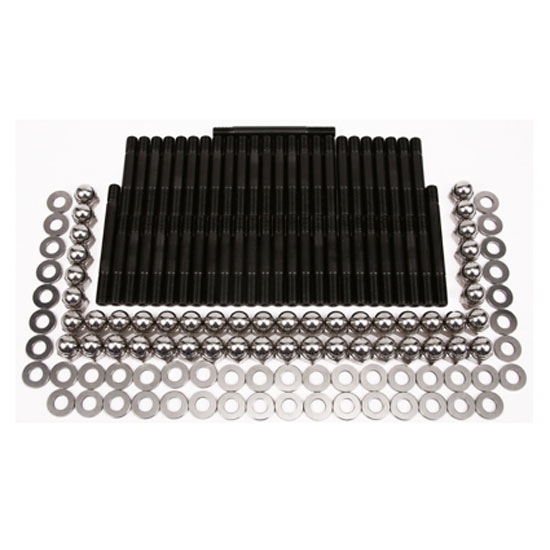
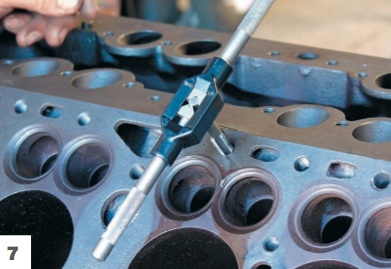
HEAD BOLTS AND STUDS: I don’t believe in running a tap in the block’s head bolt holes to freshen up the threads. I think this causes the threads to becomes lightly wallowed out and not hold the bolt/stud securely during tightening. I just blow the holes out until I’m ready to install the cap screws or studs.(a)Cap screws (bolts): I clean their threads on a wire wheel on the bench grinder. Then I run a thread chaser over the threads and dip them in some thin oil before I test them in the block. If the bolts won’t run all the way in using only my fingers I work with them before I resort to using a tap. During final installation of all aluminum heads, I use grade #8 or #9 flat washers on all head studs/cap screws. Both sides of the washers get a film of light oil to increase accuracy during torquing. Cap screws get some Permatex Thread Sealant #59235toseal the bolt threads. This also helps to assure torque accuracy. Also see HEADS SECTION for discussion on aluminum head installations.(b)Studs are treated differently from cap screws. I prefer studs, especially when boring big or on engines which will be taken apart frequently. Studs are considerably more work, but I think they’re well worth it since they’re easier on the block and torque more evenly. I start by cleaning the entire stud on the bench grinder’s wire wheel. Then I chase both the NF and NC threads. I wash them in solvent to clean the grit after the thread chasing operation. I run a tap through each used head nut (only on used head nuts) after which the nuts are threaded onto a stud. I run the nuts all the way to the bottom of the stud’s NF threads using only my fingers. If they won’t go down with just my fingers, I find out why and correct the problem. I want the nuts to torque down smoothly to assure accuracy. I dip the stud’s NC threads in some thin oil and screw them into the block. If they go all the way down using only pair of ignition pliers(which are pretty small), the studs are done and ready for installation. If not,I fool with them some until I either cure the bind. One note here…. Check the HEADS SECTION for drilling aluminum heads when using studs. Final installation of studs is what takes time, but it gives these weary old bones a chance to sit on a board on my trashcan for a few hours. Studs often become warped from abuse as well as all the heat/cool cycles they are subjected to over their lifetime. This causes them to interfere with the head’s bolt holes during installation of the head. This contact is responsible for the destruction of untold numbers of heads (aluminum and cast iron) because they soon seize to the head. Making it impossible to remove the head without virtually destroying it. This it the main reason studs have a bad reputation.First I blow out all the threaded holes to insure there’s no debris in the bottom of any hole. I check the studs to verify they’re true by rolling them on the bench. I start with the middle two studs. Install the two studs all the way in using just my fingers. Then I try putting the head on to see if either hole conflicts with a stud:(1)If the stud contacts the head, I remove the stud and re-check it for straightness by rolling it across the bench. If it’s warped, I’ll set it aside and try another. Sometimes I use a hammer and attempt to straighten them.(2) After correcting the problem and there isn’t any conflict, I remove the two studs without mixing them up and coat the NC threads with a thread sealant like Permatex Thread Sealant #59235. This will prevent water from getting past the threads and deters future seizing.**(From rod nut on 1/30/03. He uses anti-seize on the stud shanks.)Then I install the two studs back into their same holes with my fingers until they bottom. I use a pair of small ignition pliers to finish snugging them down…… I do NOT torque them any tighter (spec for torque is 8-10 ft/lbs if you insist on torquing them). Any tighter and they’ll be a real bear, if not impossible, to remove at a later date.When both studs are installed permanently, I move on to two more studs and repeat the whole process. When you’re finished, the head should slide on and off the studs easily. Takes about 4 hours, but is well worth it as far as I’m concerned. When finished, install the head after slightly oiling the NF threads on each stud. Use grade #8 or #9 washers on aluminum heads to prevent distorting the aluminum with a thin oil film on both sides of the flat washers.
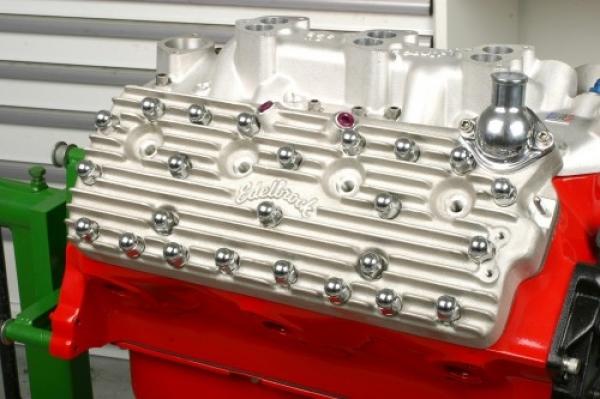
ACORN HEAD BOLT COVERS: If you’re going to use chrome acorn covers over stock Ford head nuts, you’ll find they aren’t quite as deep as the stock head nuts.This means they hit the top of the nut before they’re flush with the head washers. Replacing the head nuts with a new set of grade #8 NF nuts from a bolt supplier will cure this. They are not as thick as the stock Ford ones and the a corns fit flush down against the washers and looks a bit better. REMOVING STUDS: There are several methods I’ve used with varying degrees of success over the years. I continually try new methods when ever I hear of one.Today I use the following. I’ve listed these in order of success. Just remember to take your time and don’t get in a hurry when working on studs…… they’ll only break and then you end up with a whole bunch of new troubles. When using a stud puller, I use a torque wrench and limit the torque to 60ft/lbs to keep from breaking studs. In the following, I’m assuming the heads are removed. From Red’s Headers on 1/30/03. Limit removal torque to 75-80 ft/lbs when trying to break a stud loose to avoid breaking it.I’m nervous and limit removal torque to 70 ft/lbs .Stud pullers. There are a differences in stud pullers. I use a stud puller that grips all the way around the stud (looks similar to a deep well socket). I think these are the best and worth the price. The common cam lock type rotates an anti-slip grooved cam so it contacts and applies pressure to one side of the stud. These are lousy as far as I’m concerned. I can’t begin to guess how many studs I’ve broken in the early days using these pullers, but it’s probably in the hundreds!. (1) Soak the studs with your favorite penetrating oil several times a day for several days. I prefer “BG In-Force Ion-Activated Penetrating oil” (#438) or “Aerokroil Penetrating Oil” or “P-Blaster Penetrant” in that order. Run a head nut down flush with the stud and hit the top of the stud HARD with a big hammer a few times (like it’s a nail you’re trying to drive into the block). The impact and vibration will some times help free-up a frozen stud. Now get out the stud puller. GENTLY attempt to tighten the stud first. Then try loosening it. GENTLY work it back and forth… tighten and loosen….. tighten and loosen. The majority of the time if you’ve soaked them good and worked with them, the stud will come loose. If it won’t budge, try soaking it again over night. Don’t ever force it unless you’re sadistic.(2) This requires an acetylene torch. Heating the stud alone just expands the stud and does little to loosen them. But heating the boss in the water chamber of the block expands the boss to make the threaded hole larger. Have the stud puller on the stud and ready to use. Light the torch and put it inside the water chamber and heat up the boss… it doesn’t have to be red hot… just fairly hot will usually work. As you apply the torch, put a fair amount of strain on the stud puller. It’ll usually loosen once you have the boss pretty hot. I’ve used this method on the last five engines… and never broke a stud… which is amazing for this old geezer.The above two methods have never failed to remove a stud! Shore makes life easier.
BROKEN STUD REMOVAL: I’ve listed what works for me when I break a stud. I’ve listed them in order of my preference.(1) Electric Discharge Machine (EDM) method. There are machine shops which provide this service for $25 to $40 per stud. An electric arc is established between the stud and a carbon electrode. This arc eats away at the broken stud and vaporizes it (so to speak). The arc attacks the stud since it heats faster than the block. The threads in the block are usually not hurt and can be reused.This is my preferred method, but then I’m lazy. I had to have one done in my existing flathead (gave up and tried to force one years ago!)(2) JWL reports he welds a cap screw onto the top of the broken stud with super results.Wish I could weld that good!NOTE:The following (3) and (4) methods involve drilling a hole down the center of the stud. Drilling a hole in the center of a stud is simpler if you put a junk cast iron cylinder head on the block and use a bushing (home made )with a 3/16″ hole in the head’s bolt hole. If you have access to a lathe, you can easily turn out such a bushing or grind a nut will work. This prevents the drill from wandering off center and into the block (shudder). Suggest grinding the top of the broken stud flat (if possible) to further decrease drill wandering.Always use a center punch to dimple the broken stud dead center to decrease drill bit wander.(3) After drilling the 3/16″ hole in the stud and removing the junk cast iron head, use an acetylene torch to heat the inside of the 3/16″ hole until there maining shell of the stud is cherry red (the torch doesn’t like this very much and sputters pretty good if the tip is put in deep). Let it cool to the touch.As it cools down, the crud and rust holding the stud will often times loosen and the stud can be removed with an EZ Out. Do not install an EZ Out until the stud is cooled off to the touch. Don’t forget….. breaking off an EZ Out is sufficient reason to cry! Talk about a SOB (that stands for Shouldn’t Of Been)to remove!!!!(4) I’ve done the following, but it sure makes me nervous. Drill the aforementioned 3/16″ hole. It has to be centered exactly. Enlarge it to 3/8″with another drill bit. Heat the inside of the 3/8″ hole carefully until the remaining shell of the stud just starts to become red. Then crank up the oxygen using the same acetylene tip and blow the remains of the stud out. Work quickly before the block can heat. This shouldn’t damage the block’s threads beyond re-use as long as the torch is not directed towards them (corrosion is somewhat of an insulator). Many times it takes a couple of times before the broken stud is blown out. Scares me….. and I’m fearless!
HELI-COILS: I never install Heli-coils for studs/cap screws in specific holes in a block that’s going to have a 3-3/8″ bore. My reasoning: flathead block decks are fairly thin to begin with. When boring exceeds 3-5/16″ some stud holes along the lower edge of the block are getting fairly close to the edge of the big bore cylinders. No problem unless Heli-coiling has to be done to these holes. Drilling the stud holes oversize for a heli-coil makes this separation even less and weakens the deck even more. This will usually cause it to crack down the cylinder wall during head bolt/nut torquing. Heli-coiling can be done to other studs successfully. But we all know which ones will need a heli-coil don’t we…something like Murphy’s Law.
Was this article a help? Consider supporting the Flat-Spot by becoming a Premium Member. Members get discounts with well known retailers, a cool membership packet full of goodies and your membership goes toward helping us upkeep and expand on this great archive.


